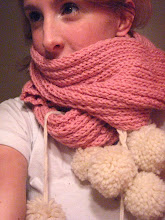
I am not real big on crochet/knitting patterns; I hate being creatively confined to the gauge and yarn and needles required for the pattern. What I usually try to do is loosely follow a basic pattern and use it as a guide to make my own modifications.
In this pattern, I have provided a basic, simple crochet hat pattern using the puff stitch. Really, you could use any kind of stitch.
Puffy Hat
Materials
- basic crochet and circular knitting skillz
- any kind of mid range yarn
- appropriate size crochet hook for chosen yarn
- corresponding size set of double pointed knitting needles
Basic Stitch Abbreviations
- st: stitch
- YO: yarn over
- lp: loop
- ch: chain
- K: knit
- P: purl
Special Stitches
- Puff Stitch (PS): (YO, insert hook in st, draw up long lp) 3 times, YO, and draw through all loops on hook, ch1.
Step 1:Crochet Hat
Round 1: Make a loop and start doing an even number of puff stitches into it.
(NOTE: Since this pattern is not for a specific yarn, you will have to determine how many stitches you will need to work in the initial loop according to the size of the yarn. Do as many stitches in the loop that fit comfortably)
Round 2: In each ch1 spot of previous round: PS, 2PS, repeat.
Round 3: Same as Round 2.
Round 4: In each ch1 spot: PS, PS, 2PS, repeat.
Round 5: Same as Round 4.
Round 6: to Last Round: PS all around.

End at a Round you deem appropriate. I usually try mine on. You want it to be not quite finished so that you can add the knitted ribbing at the bottom. Cut yarn and pull through to finish the crocheted section of the hat.
Step 2: Pick up stitches onto double pointed knitting needles.

On bottom edge of hat, pick up one stitch per crochet loop with the right side of the hat facing you. This will keep the bump that happens when picking up stitches on the inside of the hat.


This is the bump that happens when you pick up stitches.
Double check that you have an even number of stitches. If not, pick up one extra so the ribbing will be even all the way around.
Now begin your ribbing. I am doing K1P1. A stitch marker for the beginning of your Round maybe helpful.

Looks like a weird mushroom.
Make it as long as you want. I am making mine really long so that I can flip it over....

I am planning on adding a rhinestone pin on it, then giving it away to someone special.... even though I love this hat and want to keep it!


nice hat! it's very pretty! thanks for sharing the pattern!:)
ReplyDelete